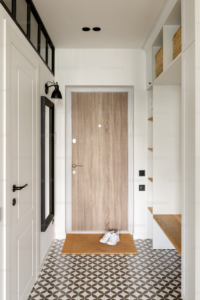
Internal doors or interior ones border different sections of buildings. On the other hand, internal doors do not aim to ensure security and protection from weather changes; instead, they define spaces in a structure to create privacy.
Internal doors can be made of wood, glass, or composite materials, offering various styles and designs to match different tastes. They are prevalent in residential homes, offices, commercial buildings, and other facilities where compartmentalization and privacy are required.
Installation of internal door fittings can be a very rewarding home improvement project that is relatively simple. Whether replacing an old door or installing a new one, fitting internal doors can enhance the appearance and usability of space. You can easily install an internal door with a few essential tools and simple carpentry skills.
Some Steps to fit an internal door
Let’s consider all the stages in detail to set an internal door.
Step 1: Take accurate measurements
Firstly, measure your door frame dimensions accurately. Mark the width and height of any existing frame, taking three measurements at various points to allow for irregularities.
Buy a door of the correct measurements that fits within an existing frame. 80 inches is the standard height of door sizes with various widths. You may purchase prehung doors with the attached frame and hinges or mount the hinge yourself.
Step 2: Remove the old door
If you’re replacing an existing door, remove it from the frame. Unscrew the old hinges off the door and frame, then gently pull out this Door. Observe where the hinges are located on the frame, as you will require that to fit the new door. This step may need another pair of hands if the door is heavy.
Step 3: Trim the door to fit into the frame
Place the new door on a pair of sawhorses or strong workbenches and lay it flat. If the door is too big for the frame, you may have to cut it down. Measure and mark how much needs to be cut away, ensuring that the gap on all sides of the door is even.
Use a straightedge and pencil to trace the lines for knife cutting. Trim the door using a wood plane or a circular saw along the marked line. Wear safety goggles to prevent dust from getting into your eyes. Use sandpaper to smooth out any sharp edges.
Step 4: Mark the hinge locations
With the door still on sawhorses, mark hinge locations. First, measure and mark where the hinge plates will go on the edge of your door so that they align correctly with the roles in your ors frame.
Use a chisel and hammer to make shallow mortises for the hinges across the edge of the door. The height of the mortise should be such that it measures equal to the thickness of the plate used in the hinge. Install the hinges to test their fit into the mortises.
Step 5: Install the hinges
Use screws to affix the hinges on the door, ensuring that they are flushed with this edge. Attach the hinges to the door frame using existing hinge locations or marks made earlier. Make sure the hinges are appropriately aligned and tightly fastened.
Step 6: Hang the door
With the hinges mounted, lift and lock onto each other side of the door, aligning well to fit in the wing pins. Carefully lower the door into the frame, and ensure even spacing around all sides.
Have someone hold the door in position as you place hinge pins and ensure that your door moves freely. Make any necessary alterations to make the door hang properly.
Step 7: Install the door handle and latch
Once hung, mark the height for the door handle and latch on both doors and frame. Drill required holes for the handle and latch according to manufacturer’s guidelines. Mount the handle and latch following the manufacturer’s instructions, utilizing supplied screws as well as hardware.
The handle and latch can now be installed, after which the door needs to be tested to close and open properly and smoothly. Adjust the hinges, latch, or strike plate to fit well. Make sure that the door fits level with the frame and seals correctly.
Finish off the installation by adding any finishing touches. This can involve painting or staining the door, sealing gaps in excess wood to improve insulation by installing weather stripping and adding a stopper on the bottom so it will not slam.
How to Maintain an Internal Door?
An internal door has to remain in position as it is useful and appealing. Below are some guidelines on how to have your internal doors fitting look great at all times.
- Clean the door surfaces regularly with a soft cloth, sponge, and mild cleaning solution, but do not use chemicals that can damage the finish. Wipe off dust, dirt, or marks, paying particular attention to the edges and handles.
- Check the hinges and screws frequently to make sure they are firmly tightened. Lubricating the hinges with a silicon-based lubricant will also ease their operation.
- Check the door for scratches, dents, or chips and repair them immediately. For minor damage, you can touch up the paint or fill in more enormous damages with appropriate wood sealers.
- Do not slam the door, as it strains hinges and can result in misalignment. Make sure to handle your internal door gently for a longer lifespan.
- If you adhere to these maintenance practices, your internal doors will continue to be beautiful and functional for years.
Conclusion
Fitting an internal door may seem daunting, but if you follow the process outlined above and use the correct tools, it is perfectly possible to do it yourself. This guide will help you fit an internal door, whether replacing your old one or installing a new one, and have everything look professional.


